Table of Contents
If you have fine hair, you’ve probably experienced that maddening moment: you carefully craft a beautiful updo, secure it with what feels like a dozen bobby pins, and within an hour, they’re sliding out like escape artists. It’s not your styling skills—it’s that most bobby pins are designed for thicker, more textured hair. Fine hair requires a completely different approach to pinning, one that accounts for its silky texture, reduced volume, and increased vulnerability to damage.
The good news? Once you understand what makes a bobby pin actually work for fine strands, you’ll never waste money on useless packs again. This guide dives deep into the engineering, materials, and professional techniques that separate pins that grip from pins that slip. Whether you’re creating everyday styles or special-occasion looks, mastering the art of bobby pin selection will transform your hairstyling game.
Top 10 Bobby Pins For Fine Hair


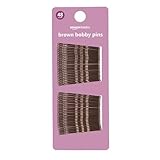

Detailed Product Reviews
Why Fine Hair Demands Specialized Bobby Pins
Fine hair isn’t just thin hair—it’s a structural difference. Each strand has a smaller diameter, which means less natural texture for pins to grip. The cuticle layer lies flatter, creating a smoother surface that standard bobby pins simply can’t hold onto. Traditional pins are engineered with tension designed for denser hair; when used on fine hair, they either slide out immediately or require such aggressive insertion that they leave visible crimps and cause breakage.
The weight distribution also matters. Fine hair lacks the heft to keep a pin in place through gravity alone. A pin that works beautifully in thick hair relies on that mass to help anchor it. With fine hair, the pin must create its own friction and tension without assistance from surrounding strands. This is why generic drugstore pins often fail—they’re not accounting for the physics of fine hair.
The Anatomy of a Bobby Pin: What Matters Most
Before shopping, understand what you’re actually examining. A bobby pin consists of three critical components: the prongs, the crimped plate, and the tips. The prongs’ flexibility determines how much pressure they exert. Too stiff, and they’ll damage fine hair; too flexible, and they won’t hold.
The crimped plate—the wavy middle section—creates the gripping action. Its pattern depth and spacing directly affect hold. For fine hair, you want a moderate crimp: deep enough to catch strands but not so aggressive that it creates visible indentations. The tips deserve special attention on fine hair. Sharp, uncoated metal ends can shred delicate strands, while properly coated, rounded tips glide in smoothly without snagging.
Material Matters: Choosing the Right Metal
Steel vs. Stainless Steel vs. Specialty Alloys
The metal composition affects both grip and hair health. Standard steel offers strong tension but can rust and snag. Stainless steel provides corrosion resistance and smoother operation, making it gentler on fine hair. Some premium options use nickel-free alloys, crucial if you have metal sensitivities.
For fine hair, consider the metal’s “spring.” You want a material that maintains tension over time but has enough give to prevent breakage. High-carbon steel with a protective coating often provides the best balance—it’s lightweight, durable, and can be engineered to the precise flexibility fine hair demands.
The Flexibility Factor
The ideal pin for fine hair should bend slightly when you press the prongs together, then spring back to shape. This resilience indicates proper tempering. Pins that feel rigid or, conversely, feel flimsy and stay bent, won’t perform well on fine strands. Test this by gently squeezing the prongs—quality pins will have a noticeable but controlled give.
Coating and Finish: The Slip vs. Grip Dilemma
Rubberized vs. Textured vs. Smooth
Here’s where most people get it wrong for fine hair. Rubberized coatings seem like they’d add grip, but they often create too much friction, causing pins to grab unevenly and create snarls. Smooth enamel coatings allow for easy insertion but may slide out too easily on super-fine hair.
The sweet spot? A micro-textured finish—often called a “satin” or “matte” coating—that provides subtle grip without stickiness. These finishes create just enough friction against the hair’s cuticle without catching or pulling. They’re particularly effective for fine hair that tends to be silky.
The Role of Color in Coating Quality
Dark coatings (black, brown) often use different formulations than metallic ones. For fine hair, darker coatings frequently provide better grip because they contain micro-fine texturing agents. Metallic finishes, while pretty, can be slicker. If you need maximum hold, opt for matte or satin finishes in hair-matching tones rather than shiny metallics.
Size and Length: Finding Your Perfect Fit
Standard, Mini, and Extended Lengths
For fine hair, shorter isn’t always better. Mini pins (under 2 inches) work for face-framing pieces but lack the leverage for secure updos. Standard 2-inch pins offer versatility, while 2.5-3 inch “extended” pins distribute pressure over more hair, reducing the risk of crimp marks on fine strands.
The key is matching pin length to your hair density and style. If you have fine but abundant hair, longer pins provide better anchoring. For very sparse fine hair, a standard length with a finer gauge often works better than a long, thick pin that overwhelms the section.
Width Considerations
Prong width affects how much hair gets captured. Narrower prongs (about 3mm) work best for fine hair because they target smaller sections precisely. Wider prongs grab too much hair, creating tension points that slip out. Look for pins with a gentle taper—wider at the base for strength, narrowing toward the tips for precision.
Wire Gauge: The Hidden Specification That Changes Everything
Wire gauge—the thickness of the metal wire itself—is rarely discussed but critically important. Fine hair performs best with 24-26 gauge wire (higher numbers mean thinner wire). This provides enough structure without excessive bulk.
Thicker gauges (20-22) create too much tension and leave obvious marks. Thinner than 26 gauge, and the pin lacks the necessary spring to hold. Unfortunately, most manufacturers don’t list gauge, so you’ll need to judge by feel. The ideal pin should feel substantial but not heavy, flexible but not bendable.
Pin Design Variations Beyond the Classic
Spiral Pins and Twisted Designs
Spiral pins, which twist into hair rather than sliding, can work brilliantly for fine hair when sized appropriately. They distribute pressure 360 degrees, reducing stress points. However, they must be thin enough not to stretch fine strands.
U-Pins and Hair Pins
Traditional U-pins (no crimp) excel at anchoring large sections without leaving marks. For fine hair, choose U-pins with a slight wave or texture—purely smooth ones slide out. The open design allows you to weave them through hair for mechanical hold rather than relying on tension alone.
Flat Lying Pins
Newer flat-profile pins sit flush against the scalp, ideal for fine hair that shows every bump. They use a wider, flatter crimp plate that distributes pressure horizontally. This design prevents the “pin dent” that’s so visible in fine hair.
Color and Camouflage: Matching Your Hair Tone
Strategic Color Selection
On fine hair, every pin shows more prominently. Matching your pin color to your root shade creates instant invisibility. But there’s a strategy here: using slightly lighter pins than your hair can actually make them less visible because they reflect light similarly to your strands.
For updos, consider using two tones: hair-matching pins for the structure, then one shade lighter for final details. The lighter pins catch light like your hair does, making them disappear visually while the darker ones hide underneath.
Matte vs. Shiny Finishes
Matte finishes absorb light, making pins disappear in fine hair. Shiny finishes create focal points—useful if you want pins as accessories, problematic if you want them hidden. For everyday wear on fine hair, matte finishes in ash brown, dark blonde, or soft black (depending on your shade) outperform shiny black or metallics.
The Grip Factor: What Makes Pins Stay Put
Crimp Pattern Engineering
The wave pattern in the crimp plate determines everything. For fine hair, you want 8-10 waves per inch—enough to catch hair but not so many that they create drag. Deep, aggressive waves (5-7 per inch) meant for thick hair will slide right out of fine strands.
Examine the crimp under magnification if possible. Quality pins for fine hair have rounded, smooth wave peaks rather than sharp angles. This prevents hair from getting trapped and breaking during removal.
Tension Distribution
The best pins for fine hair create tension along the entire length of the prongs, not just at the tips. This distributes holding power and prevents the pin from pivoting and loosening. Test this by inserting a pin and gently tugging—it should resist evenly along its length.
Damage Prevention: Protecting Delicate Strands
Tip Design and Coating
The most critical damage-prevention feature is the tip. Look for pins with dipped or coated tips—preferably in a flexible material like silicone or rubber. These cushion the metal end and prevent it from acting like a tiny spear through your hair shaft.
Avoid pins with visible seams or rough edges at the tips. Run your finger along the prongs; anything that snags your skin will shred fine hair. The tips should be perfectly smooth and slightly rounded.
Insertion and Removal Technique
Even the best pin can damage hair if used incorrectly. Always insert pins with the wavy side down (against your scalp) for fine hair—this seems counterintuitive but the waves grip better against the scalp’s slight texture. Remove pins by gently twisting them open rather than yanking straight out, which prevents pulling fine hairs.
Professional Techniques for Maximum Hold
The Directional Pinning Method
Pros never insert pins perpendicular to the hairline. For fine hair, insert pins at a 45-degree angle, pointing toward the center of your style. This uses the hair’s natural growth direction to help anchor the pin. The first pin should always be your anchor—insert it, then add supporting pins crossing over it in an X pattern.
Creating Texture for Grip
Fine hair needs texture to hold pins. Before styling, use a texturizing powder or dry shampoo at the roots. This creates microscopic roughness that pins can grab. For sleek styles, apply texture only where pins will sit, keeping the visible sections smooth.
The Locking Technique
After inserting a pin, gently press the prongs together with your fingers for 2-3 seconds. This “sets” the tension to your specific hair thickness. For extra security, slide a second pin through the crimp of the first—this creates a mechanical lock that fine hair can’t escape.
Common Mistakes Fine-Haired People Make
Using Too Few Pins
Fine hair requires more pins, not fewer. Where thick hair might need 5 pins for a chignon, fine hair needs 8-10, strategically placed. The mistake is using 3-4 pins and hoping they’ll hold. Instead, use many pins with light tension rather than few pins with heavy tension.
Wrong Side Up
The wavy side goes down—always. The flat side lacks grip and will slide out in minutes on fine hair. This is the single most common mistake and the easiest to fix.
Ignoring Hair Prep
Trying to pin freshly washed, silky hair is futile. Fine hair needs day-old texture or a light product for grip. Even a tiny amount of hair oil at the roots can sabotage hold. Always prep fine hair before pinning.
Maintenance and Care: Extending Pin Lifespan
Cleaning Your Pins
Product buildup destroys grip. Soak pins weekly in warm water with a drop of clarifying shampoo for 10 minutes, then rinse and air dry. Avoid alcohol-based cleaners that can degrade coatings. For coated pins, use a soft toothbrush to gently scrub the crimp area where product accumulates.
Storage Solutions
Tossing pins in a drawer bends them and damages coatings. Store them in a magnetic pin dish or a small box with foam inserts that keep them separated. This maintains their tension and prevents scratching that creates snags.
When to Retire Pins
If a pin’s coating is chipped, toss it immediately—exposed metal will damage fine hair. If the prongs no longer spring back when squeezed, the metal has fatigued and won’t hold. For daily-use pins on fine hair, expect a 3-6 month lifespan before tension loss.
Budget vs. Premium: What You’re Really Paying For
The Consistency Factor
Cheap pins vary wildly in gauge and tension within the same pack. One pin might be perfect, the next too loose. Premium pins are manufactured to tight tolerances, ensuring every pin performs identically. For fine hair, this consistency is worth the price—you’re not wasting time testing each pin.
Coating Durability
Budget pins often have spray-on coatings that chip after a few uses. Premium pins use electroplating or powder coating that lasts months. Given that fine hair shows every imperfection, a pin that maintains its smooth finish is essential.
Cost Per Wear
A $2 pack of 50 pins that lasts 2 months costs more per usable pin than a $8 pack of 20 that lasts 6 months. Fine hair chews through cheap pins faster because they lose tension quickly. Investing in quality actually saves money and prevents hair damage.
Eco-Friendly and Sustainable Options
Recyclable Materials
Look for pins made from 100% recyclable metals like stainless steel. Avoid mixed-material pins (metal with plastic tips) that can’t be recycled. Some manufacturers now offer take-back programs where you can send used pins for recycling.
Plastic-Free Packaging
Fine hair benefits from pins sold in paper or metal tins rather than plastic blister packs. Plastic packaging can create static that transfers to pins, making them cling to hair unevenly. Metal tins double as storage, maintaining pin integrity.
Durability as Sustainability
The most eco-friendly pin is the one you don’t have to replace. Pins designed specifically for fine hair last longer because they’re not overstressed. Choosing the right pin reduces waste and protects your hair—a double win.
Frequently Asked Questions
Why do bobby pins always slide out of my fine hair?
Standard bobby pins are engineered for medium to thick hair textures. Fine hair has a smoother cuticle and less mass, so pins can’t generate enough friction. You need pins with a finer gauge, micro-textured coating, and proper crimp spacing designed specifically for slippery, fine strands.
Should I use hairspray on my pins before putting them in?
Lightly misting pins with a flexible-hold hairspray can add grip, but do it 30 seconds before insertion so they’re tacky, not wet. Avoid doing this with coated pins regularly, as product buildup degrades the finish faster. For daily use, rely on proper pin selection rather than hairspray.
What’s the best way to store bobby pins for fine hair?
Use a magnetic pin dish or a small container with a foam insert that keeps pins separated and maintains their shape. Avoid throwing them in a bag where they’ll bend and scratch. Store them away from humidity, which can cause rust on non-stainless pins.
How many bobby pins should I expect to use for an updo?
Fine hair typically requires 1.5 to 2 times more pins than thick hair. A simple twist might need 6-8 pins, while a chignon could require 12-15. It’s better to use more pins with gentle tension than to rely on a few pins cranked in tightly.
Are spiral pins better than traditional bobby pins for fine hair?
Spiral pins can be excellent because they distribute pressure 360 degrees, but only if they’re specifically designed for fine hair. Thick spiral pins will stretch and damage fine strands. Look for spirals with thin wire (24+ gauge) and smooth, coated tips.
How often should I replace my bobby pins?
With daily use on fine hair, replace pins every 3-6 months or when you notice tension loss, coating chips, or rough tips. Since fine hair shows damage immediately, err on the side of caution. Rotate through a set of 20-30 pins rather than using the same few repeatedly.
Can I bend bobby pins to make them fit better?
Never bend pins to alter their shape—this weakens the metal and creates stress points that break hair. Instead, buy pins in the correct size and gauge for your needs. Bent pins lose their spring tension and become useless for fine hair.
What’s the difference between hair pins and bobby pins for fine hair?
Hair pins (U-pins) rely on weaving through hair for mechanical hold, making them gentler for fine strands. Bobby pins use tension and crimping. For fine hair, use U-pins for anchoring large sections and bobby pins for securing details. The best approach combines both.
Should I match bobby pins to my hair color or root color?
Match to your root color for true invisibility. If your roots are darker than your lengths, choose a pin that splits the difference. For highlighted fine hair, using two tones—matching your base for structure, and a slightly lighter shade for detail work—creates the most natural look.
Why do my bobby pins leave dents in my fine hair?
Dents occur when pins exert too much pressure in one spot. Fine hair compresses easily and holds creases. Use pins with finer gauge wire, insert them at an angle rather than straight in, and avoid crossing pins directly on top of each other. A light mist of flexible hairspray before pinning can also help hair resist compression.